

[ezcol_1half]
This tutorial is a great way to get up and running with CMaps Plugin for SAP BusinessObjects Dashobards (formerly Xcelsius).
Want to build your first map in CMaps Designer? Click Here
Install CMaps Plugin in SAP Dashboards
Add and Configure your First Map
1. Open SAP Dashboards and Open the the included blank template:
2. Locate CMaps Plugin / GMaps Plugin Component
From the components window locate CMaps Plugin (formerly GMaps Plugin) located at the end of the “Maps� category.
3. Drag and drop CMaps Plugin / GMaps Plugin onto the canvas.
4. (Trial Users Only) Paste and Bind your trial key
a. Obtain your trail key from CMaps Analytics extensions siteÂ
b. Copy and paste your trail key into the spreadsheet
c. Inside the CMaps Analytics sheet, click the bind the key property (located at bottom of General Tab) to the cell containing your key. site

Build your first map layer
1. Bind Locations
For your first map layer, you will create points on a map from locations. Bind the Address Lat/Long Range property to range:Â Data Points’!B9:B14
2. View the results
In design mode using the refresh button (located in upper right corner of property sheet), you can preview the results on the map without having to go into “Preview” mode.
![]()
3. Bind Labels:
Labels will appear for end users when points are selected by end users. You will have 1 label per location. Bind the Labels property to range:Â Data Points’!D9:D14
Have a lot of addresses or country names? Check out these performance saving tips.
4. Bind Values
Values are critical to dictate map point visuals like dynamic sizing, alert colors, and other visual cues to indicate to end users the relative values. Bind the Values property to ‘Data Points’!H10:H14
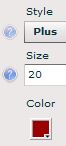
5. Modify Icon Appearance
Go to the Appearance Tab and scroll down to Style and Color picker, where you can change the visual appearance of your icons. You can also explore other appearance capabilities to transform the map styling.
6. Press Preview
Now you have your first interactive map in 10 simple steps. In later modules you will dive deeper into these properties to learn best practices, tips, and common use cases. Moving forward you will expand from the basic concepts covered above to transform a basic map with pins into a robust location analytics tool.
[/ezcol_1half] [ezcol_1half_end]CMaps Plugin Resources to Succeed
[ezcol_1third]
CMaps knowledge hub
A single entry point to all resources including templates, videos, and tutorials.

CMaps Plugin 101
Self guided testing and testing to ensure you learn all basic features.

Introducing CMaps Plugin Webinar
Overview how it works, the latest updates and future road-map / direction.

Get common administrative areas
Immediately import regions into your dashboards.
5 Lessons to Master CMaps Plugin
Quick “best practices” guide that ensures you get the most from your maps.
Top 10 Features to Build Great Dashboards?
These are 10 features you need to know to also master CMaps Plugin